A Grounded Spacecraft
Ever since I came across the intricate circuit designs by Mohit Bhoite I knew that I would end up making one.
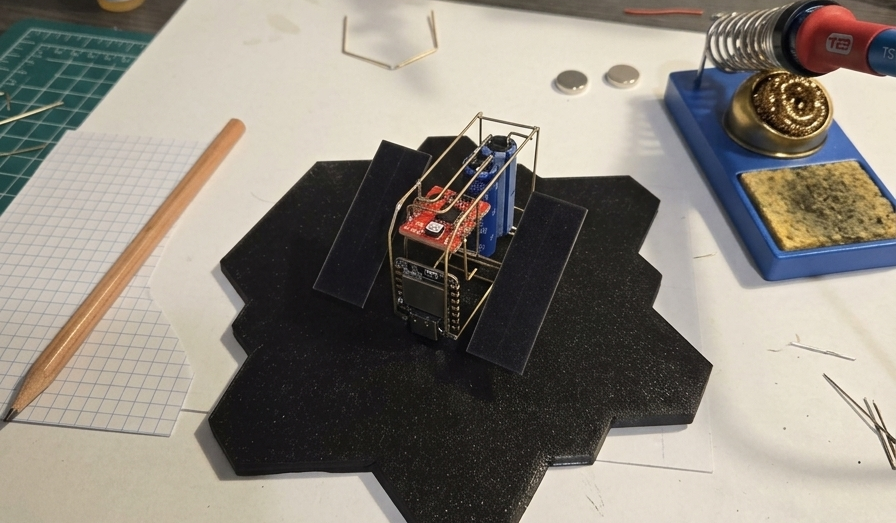
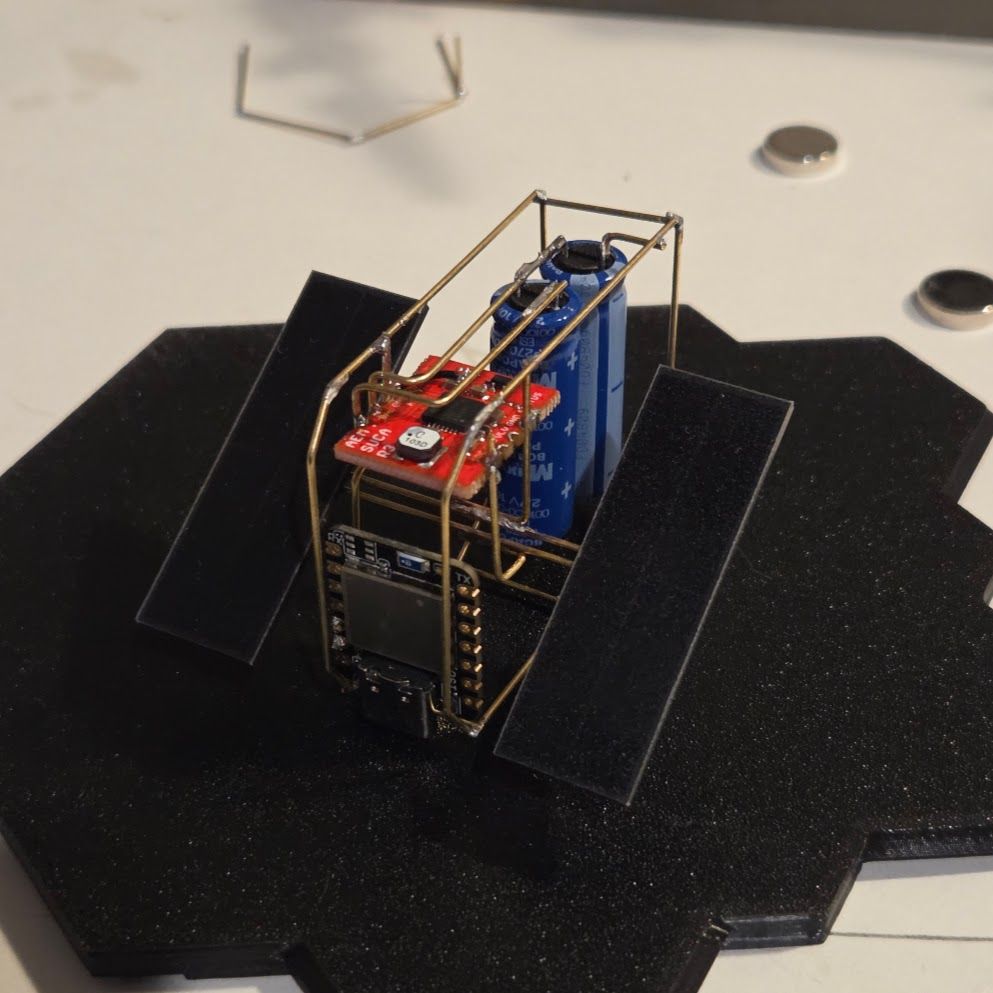
It was a small circuit sculpture featuring two solar cells, a small battery, and perhaps the smallest 7-segment LCD I’d ever seen. The wiring of this circuit formed the structure of the sculpture and held the components together to create a satellite shape that looked straight out of LEO.
As it turns out, Mohit has provided incredibly detailed write-ups covering the material, tools, and process for each of his sculptures. With a pretty long background of soldering and electrical design, I had a feeling that the technical requirements would be easy to meet but the real challenge would come from the artistic side of the project.
After first attempting and failing to free-hand a hexagonal voyager-style probe design I made the smart decision to capture the design feel that I liked from one of Mohit’s other sculptures and build off of it.
I wanted to steer away from the use of a LiPo battery for this project as my aim was to create something fully wireless and self-sufficient. I came across a great solar charge circuit (link) on Tindie which seemed to align with the specs I had established.
The Build
In order to accommodate the solar charging circuit and 10F supercapacitors with the wiring for the solar cells, I settled on an elongated version of Mohit’s Cumin lander for the shape. Despite having the most experience with LiPos, I opted for supercapacitors. This meant trading away energy density, but in return I got something effectively maintenance-free: they shrug off hundreds of thousands of charge cycles where a LiPo would degrade in a year or two, and there's no risk of thermal runaway from a battery charging unattended in a sunny window all day. For a "set it on the windowsill and forget it" probe, that tradeoff was an easy call.
Claude helped me to resolve some dependency issues and, in short time, I was able to get the Espressif toolchain set up. Now originally I was going to make a best effort pass at optimizing the power consumption of the nRF52840 but then I stumbled across this video published in the same week that I was starting to work on the firmware.
Home Assistant Integration
Initially I thought I’d be able to add the microcontroller to my home assistant network over a Thread network managed by the Google home mini we use in the kitchen. Unfortunately, Thread radios weren’t included in the Google ecosystem until the newer Google Nest Hub lineup so I would need to find another way.
Using this relic from a few years back when Thread was still only available in dev kits I was able to create a simple Thread border router using firmware provided by the OpenThread project.
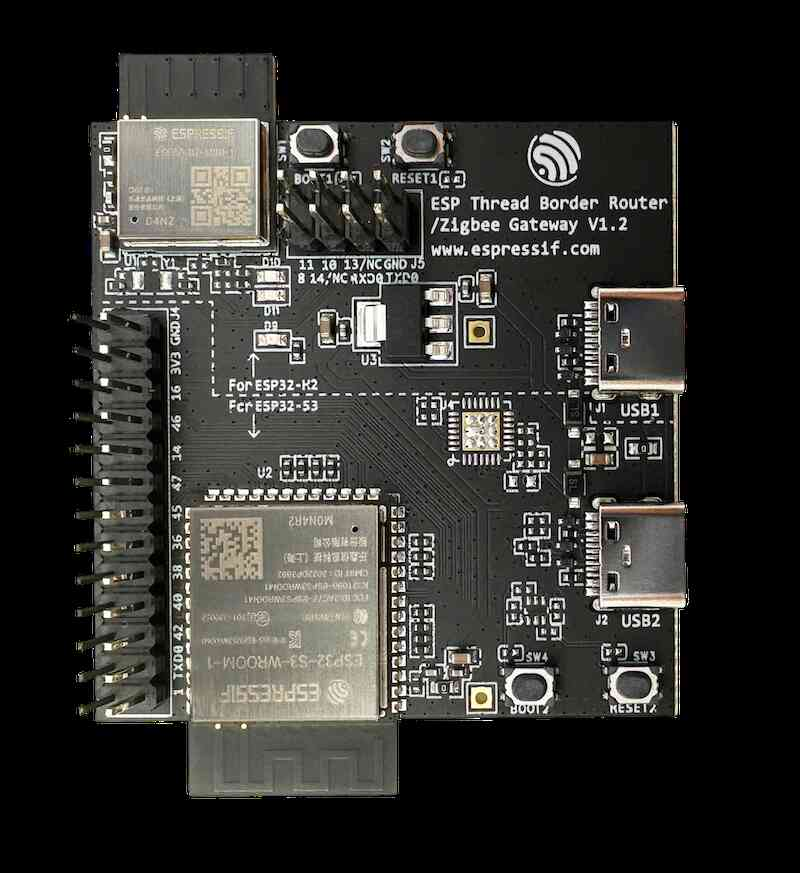
After getting Claude’s help to optimize the build enough to fit within the ESP32’s 4MB flash I was able to get home assistant to recognize the Thread router. Looking forward to building out my Thread network with more ESP32-H2 boards in the future.
Connecting the solar probe to my new Thread network was fairly straight forward after that. I placed the probe on the windowsill and waited for a break in the rain. Soon enough, the temperature reading blips started coming through, plotting out a nice temperature curve throughout the day.
What’s Next?
I still have another nRF52840 and some i2c 128x64 oled displays from before I had a clear idea of what I wanted to do with the probe though I suspect I’ll need to scrounge up a LiPo battery to support the power consumption.
I still have a number of solar cells and some spare ICs so perhaps something less functional and more artistic. I’d really like to plan out the layout and draw out the design in advance for the next build.